
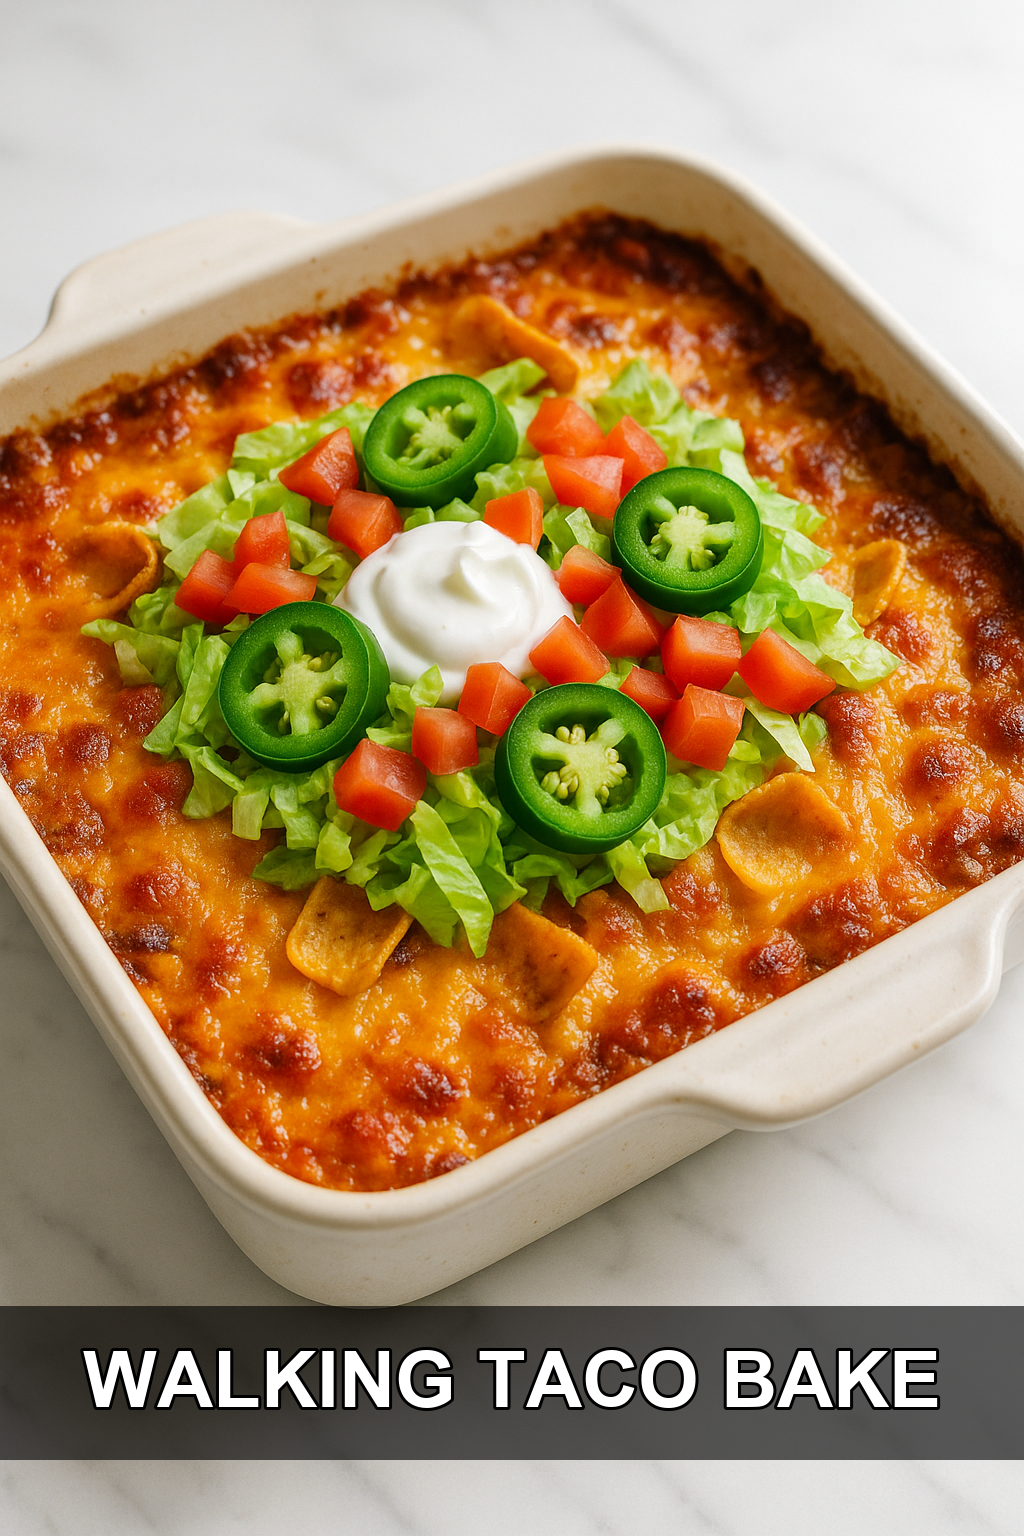
- What Is Walking Taco Bake?
- Tips for Cooking and Prepping
- Recipe Variations and Substitutes
- Serving Suggestions
- Storing, Make-Ahead, and Freezing Tips
- FAQs
- Easy Walking Taco Bake Recipe
If your family loves the classic walking taco but you’re tired of assembling individual bags, this Walking Taco Bake is about to become your new weeknight hero. It takes everything great about that fair-food favorite—crunchy corn chips, seasoned beef, melty cheese—and layers it into one easy casserole that feeds a crowd without draining your grocery budget.
What Is Walking Taco Bake?
A walking taco is a fun, portable snack made by cutting open a bag of Fritos or corn chips and loading it up with taco meat, cheese, and toppings—perfect for ballgames, fairs, and school lunches. Walking Taco Bake takes that same beloved combo and turns it into a layered casserole, so instead of juggling individual chip bags, you get one big pan everyone can dig into together.
It’s essentially a Tex-Mex twist on a classic casserole: seasoned ground beef simmered with beans and diced tomatoes, sandwiched between layers of corn chips and gooey cheddar, then baked until bubbly. It’s the kind of recipe that comes together with pantry staples, feeds six easily, and always disappears fast at the dinner table.
Tips for Cooking and Prepping
#1: Brown the beef in batches if you’re doubling the recipe
If you’re feeding a bigger crowd and doubling everything, brown the ground beef in two batches instead of overcrowding the skillet—it browns better and drains more easily that way.
#2: Buy ground beef on sale and freeze extra portions
Ground beef is often cheapest when bought in bulk or family packs on sale, so grab extra and portion it into 1-pound freezer bags for future batches of this bake (or tacos, chili, and more).
#3: Don’t skip the simmer step
Letting the meat mixture bubble with the beans and tomatoes for a few minutes helps thicken everything up so your bake isn’t watery once it’s out of the oven.
#4: Layer the chips right before baking
Add the bottom layer of corn chips just before you spoon the meat mixture over them, so they stay crispier and don’t turn soggy while you’re prepping other ingredients.
#5: Use store-brand canned goods to save money
Store-brand diced tomatoes with green chiles, black beans, and shredded cheese taste nearly identical to name brands here and can shave a few dollars off your grocery bill.
#6: Save toppings for serving time, not baking time
Keep lettuce, fresh tomato, and sour cream off the casserole until after it comes out of the oven—this keeps everything fresh and crisp instead of wilted or watery.
Recipe Variations and Substitutes
This recipe is forgiving and easy to customize based on what’s in your fridge or pantry. Swap ground turkey, chicken, or plant-based crumbles for the beef, use pinto or kidney beans instead of black beans, or try a Mexican cheese blend instead of straight cheddar. Crushed tortilla chips or even Doritos work in a pinch if you’re out of classic corn chips.
Serving Suggestions
Walking Taco Bake is a full meal on its own, but it pairs nicely with a simple side salad, Mexican rice, or a bowl of tortilla soup for a heartier spread. Set out bowls of toppings—lettuce, diced tomato, jalapeños, green onions, and avocado—so everyone can build their own plate exactly how they like it.
Storing, Make-Ahead, and Freezing Tips
Leftovers keep well in the fridge for up to 3-4 days in an airtight container, though the chips will soften over time. You can prep the meat and bean filling a day ahead and refrigerate it separately, then layer and bake when you’re ready; for freezing, freeze the meat mixture on its own rather than the assembled bake, since corn chips don’t freeze and thaw well.
FAQs
Can I make Walking Taco Bake ahead of time?
Yes—cook the meat and bean mixture up to a day in advance and store it in the fridge, then layer it with chips and cheese and bake fresh when you’re ready to eat. This keeps the chips from getting soggy while sitting in the fridge.
Can I freeze Walking Taco Bake?
It’s best to freeze just the meat and bean filling rather than the fully assembled bake, since corn chips lose their crunch after freezing and thawing. Thaw the filling in the fridge overnight, then layer with fresh chips and cheese before baking.
What can I use instead of Fritos?
Tortilla chips or even crushed Doritos work great if you don’t have corn chips on hand—just make sure they’re sturdy enough to hold up under the meat and cheese layers.
How do I keep the chips from getting soggy?
Bake the casserole uncovered so the top layer of chips gets crispy, and try to serve it soon after baking rather than letting it sit covered for a long time.
Is this recipe spicy?
As written, it’s mild to medium depending on your taco seasoning and diced tomatoes with green chiles, but you can dial up the heat with jalapeños or a spicier taco seasoning, or dial it down with plain diced tomatoes.
Easy Walking Taco Bake Recipe
Prep time: 15 min | Cook time: 30 min | Total time: 45 min | Servings: 6
Ingredients
For the Meat Filling
- 1 lb ground beef
- 1 packet taco seasoning
- 1/2 cup water
- 1 can (15 oz) black beans, drained and rinsed
- 1 can (10 oz) diced tomatoes with green chiles
For Layering
- 3 cups corn chips
- 2 cups shredded cheddar cheese
For Serving
- 1/2 cup sour cream
- Optional toppings: chopped lettuce, diced tomato, sliced jalapeño, green onions, avocado
Instructions
- Preheat your oven to 350°F.
- Brown the ground beef in a large skillet over medium heat, breaking it up as it cooks. Once no longer pink, drain off the excess grease.
- Stir in the taco seasoning and water. Let it simmer until thickened, not soupy but not dry.
- Add the black beans and diced tomatoes with green chiles. Stir well and simmer for 2-3 minutes.
- Spread half the corn chips across the bottom of an 8×8 baking dish.
- Spoon the meat and bean mixture over the chips, then sprinkle with half the cheese. Layer the remaining chips on top, followed by the rest of the cheese.
- Bake uncovered for about 20 minutes, or until the cheese is bubbly and the edges are lightly crispy.
- Let cool for about 5 minutes, then top with sour cream and your favorite toppings before serving.
Feel free to swap in ground turkey, pinto beans, or a cheese blend based on what you have on hand—this recipe is very forgiving and great for using up odds and ends in the fridge.
Leave a Reply
You must be logged in to post a comment.