
- What Is Kimchi Shrimp Fried Rice?
- Tips for Cooking and Prepping
- Recipe Variations and Substitutes
- Serving Suggestions
- Storing, Make-Ahead, and Freezing Tips
- FAQs
- Kimchi Shrimp Fried Rice with Crispy Garlic Chips Recipe
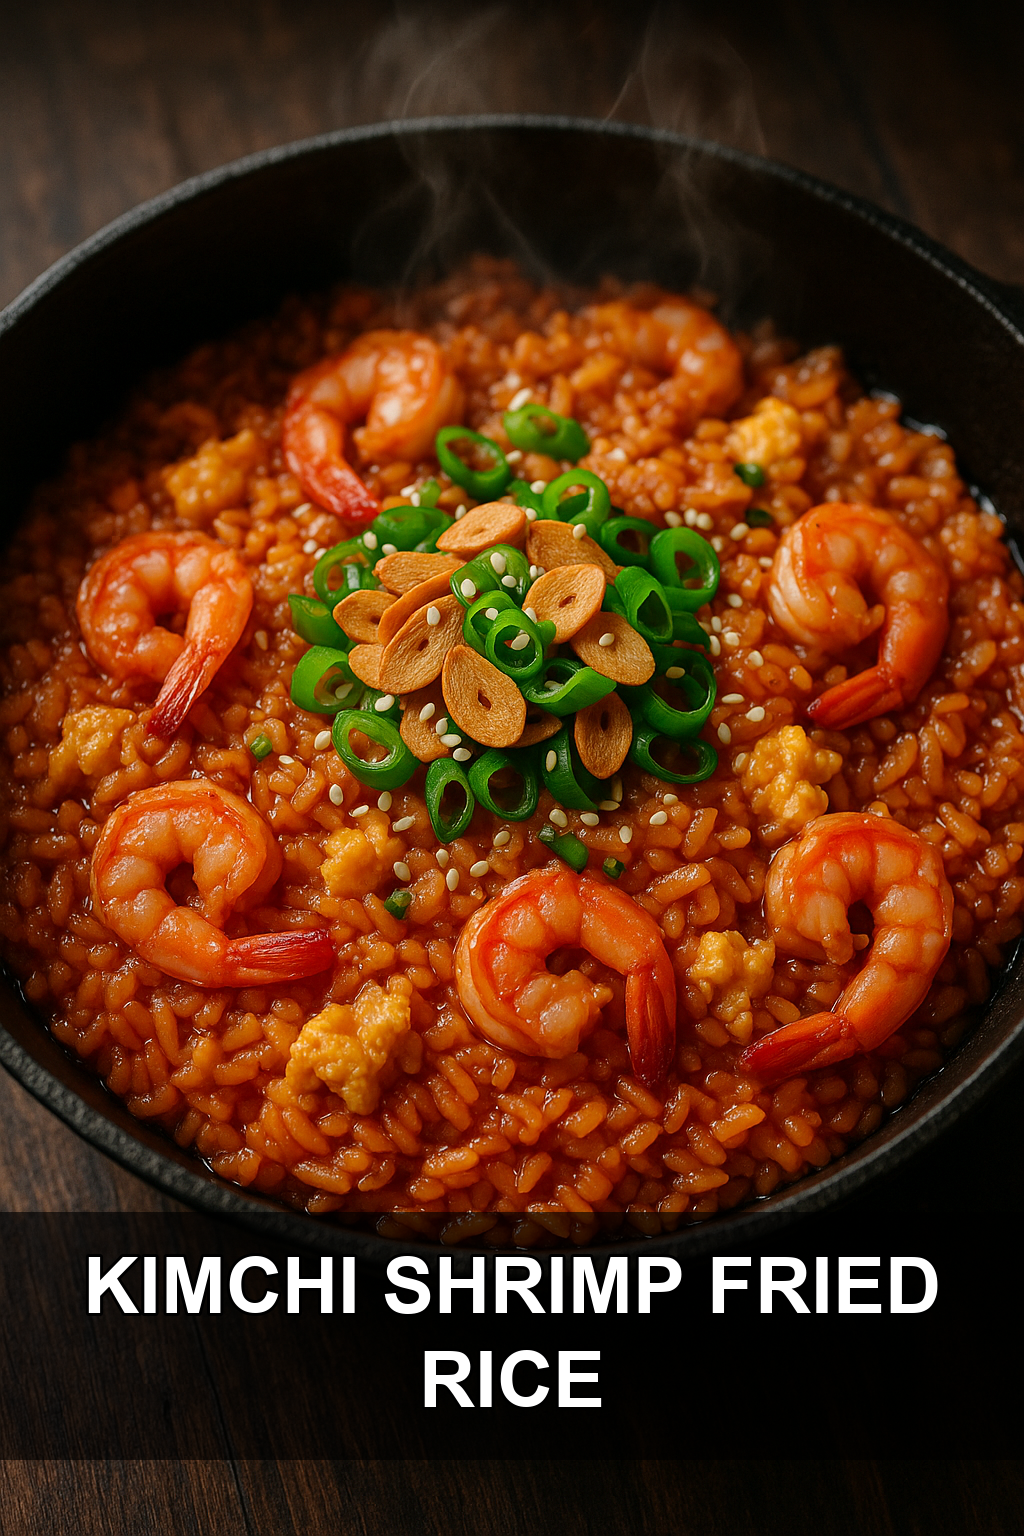
If you’ve got a jar of funky, fermented kimchi hanging out in your fridge, this is the recipe that’s going to make it shine. Kimchi shrimp fried rice is spicy, savory, a little tangy, and topped with golden crispy garlic chips that add the perfect crunch to every bite.
What Is Kimchi Shrimp Fried Rice?
Kimchi fried rice, known as kimchi bokkeumbap in Korean cooking, is a beloved comfort food built around using up ripe, well-fermented kimchi in the best possible way. The kimchi is sautéed until its edges caramelize slightly, releasing a deep umami tang that infuses the rice with flavor, while the brine adds moisture and a little heat.
This version amps things up with plump, quick-cooking shrimp for protein and a topping of crispy garlic chips, which are exactly what they sound like: thin slices of garlic fried until golden and crunchy, similar to fried shallots. The result is a one-pan meal that’s spicy, savory, slightly funky, and endlessly craveable.
Tips for Cooking and Prepping
#1: Use day-old, cold rice
Freshly cooked rice is too soft and steamy, which leads to mushy fried rice. Cold, day-old rice has dried out slightly and separates easily in the pan, giving you that classic fried-rice texture.
#2: Cook the garlic chips first, in the same oil
Frying the garlic chips before the shrimp and rice means you get to reuse that fragrant garlic-infused oil for the rest of the dish, building an extra layer of flavor for free.
#3: Use well-fermented, sour kimchi
Very fresh, mild kimchi won’t give you the same punch. Look for kimchi that’s been in the fridge a few weeks and tastes noticeably sour and funky — that’s exactly what you want here.
#4: Don’t overcook the shrimp
Shrimp cook in just 2-3 minutes per side and turn rubbery fast. Pull them from the pan slightly underdone and stir them back in at the end so they finish gently in the residual heat.
#5: Keep the garlic chips thin and uniform
Slice the garlic as thinly and evenly as possible, ideally with a mandoline or very sharp knife, so every chip fries at the same rate and crisps up without burning.
#6: Season with the kimchi brine, not just the kimchi
Don’t drain and toss the liquid clinging to your kimchi — a splash of that tangy brine stirred into the rice at the end adds acidity and depth that soy sauce alone can’t replicate.
Recipe Variations and Substitutes
Swap the shrimp for diced chicken thigh, thinly sliced pork belly, or crispy tofu if you want a different protein, or leave it out entirely and add extra vegetables for a vegetarian version. You can also stir in a spoonful of gochujang for extra heat and depth, or fold in a handful of chopped scallions, shredded carrot, or frozen peas for more color and crunch. For a richer, more indulgent finish, top each bowl with a fried egg with a runny yolk.
Serving Suggestions
Serve this fried rice straight from the pan in shallow bowls, topped generously with the crispy garlic chips and a sprinkle of sesame seeds and sliced scallions. It pairs beautifully with a side of quick-pickled cucumbers, a simple cucumber salad, or extra kimchi on the side for those who like things extra spicy. A drizzle of toasted sesame oil and a squeeze of lime just before serving brightens up all the deep, savory flavors.
Storing, Make-Ahead, and Freezing Tips
Store leftover fried rice in an airtight container in the fridge for up to 3 days; keep the garlic chips separate in a small container at room temperature so they stay crisp. To reheat, stir-fry the rice in a hot skillet with a splash of water or oil rather than microwaving, which helps restore some of that fried texture. This dish also freezes well for up to 2 months — just thaw overnight in the fridge before reheating, and add fresh garlic chips right before serving.
FAQs
Can I use fresh kimchi instead of aged kimchi?
You can, but the dish will taste milder and less tangy. If your kimchi is fresh, let it sit at room temperature for a day or two, or add an extra splash of the brine and a little rice vinegar to mimic that sour depth.
What kind of rice works best for fried rice?
Short or medium-grain white rice works great, but day-old jasmine or even leftover sushi rice also works well. The key is using cold, refrigerated rice rather than freshly steamed rice.
How do I keep the garlic chips crispy?
Fry them low and slow until just golden, then immediately transfer them to a paper towel-lined plate to drain — they’ll continue crisping as they cool. Store them uncovered or loosely covered at room temperature, not in the fridge, to prevent sogginess.
Is this recipe very spicy?
It has a moderate kick from the kimchi, but it’s easily adjustable. Use a milder kimchi and skip any extra gochujang or chili flakes if you prefer a gentler heat level, or add sriracha for more.
Can I make this dish vegetarian?
Absolutely — just omit the shrimp and add crispy pan-fried tofu or extra vegetables like mushrooms, zucchini, or bean sprouts. Make sure to check that your kimchi is vegetarian, since traditional kimchi often contains fish sauce or shrimp paste.
Kimchi Shrimp Fried Rice with Crispy Garlic Chips Recipe
Prep time: 15 min | Cook time: 20 min | Total time: 35 min | Servings: 4
Ingredients
For the Crispy Garlic Chips
- 6 large garlic cloves, sliced very thin
- 1/3 cup neutral oil (such as vegetable or avocado oil)
For the Fried Rice
- 1 lb medium shrimp, peeled and deveined
- Salt and black pepper, to taste
- 1 1/2 cups well-fermented kimchi, chopped, plus 2 tbsp of the brine
- 1 tbsp gochujang (optional, for extra heat)
- 4 cups cold, cooked white rice (day-old is best)
- 2 tbsp soy sauce
- 1 tsp sugar
- 1 tsp toasted sesame oil
- 3 scallions, thinly sliced, whites and greens separated
- 2 large eggs, lightly beaten
- Sesame seeds, for garnish
Instructions
- Make the garlic chips: Add the sliced garlic and oil to a cold small saucepan or skillet. Turn the heat to medium-low and fry, stirring frequently, until the garlic turns light golden, about 4-6 minutes. Watch closely near the end, as it can burn quickly. Remove with a slotted spoon to a paper towel-lined plate and immediately season with a pinch of salt. Reserve the garlic-infused oil.
- Season the shrimp with a pinch of salt and pepper. Heat 1 tablespoon of the reserved garlic oil in a large skillet or wok over medium-high heat. Add the shrimp in a single layer and cook for 1-2 minutes per side, until just pink and cooked through. Transfer to a plate.
- Add another tablespoon of the garlic oil to the same pan. Add the chopped kimchi and the whites of the scallions, and cook, stirring occasionally, for 3-4 minutes until the kimchi is fragrant and slightly caramelized at the edges. Stir in the gochujang, if using.
- Add the cold rice to the pan, breaking up any clumps with your spatula. Stir-fry for 4-5 minutes, pressing the rice into the pan occasionally to let it crisp slightly, until it’s heated through and coated in the kimchi mixture.
- Push the rice to one side of the pan and pour the beaten eggs into the empty space. Scramble gently until just set, then fold the eggs through the rice.
- Stir in the kimchi brine, soy sauce, sugar, and sesame oil. Return the cooked shrimp to the pan and toss everything together until well combined and heated through.
- Taste and adjust seasoning with additional soy sauce or brine as needed. Divide among bowls and top generously with the crispy garlic chips, scallion greens, and a sprinkle of sesame seeds before serving immediately.
For extra crunch and flavor, save a spoonful of the garlic-infused frying oil to drizzle over each bowl right before serving. If your kimchi is very juicy, drain some of the liquid before chopping so the rice doesn’t turn soggy.
Leave a Reply
You must be logged in to post a comment.