
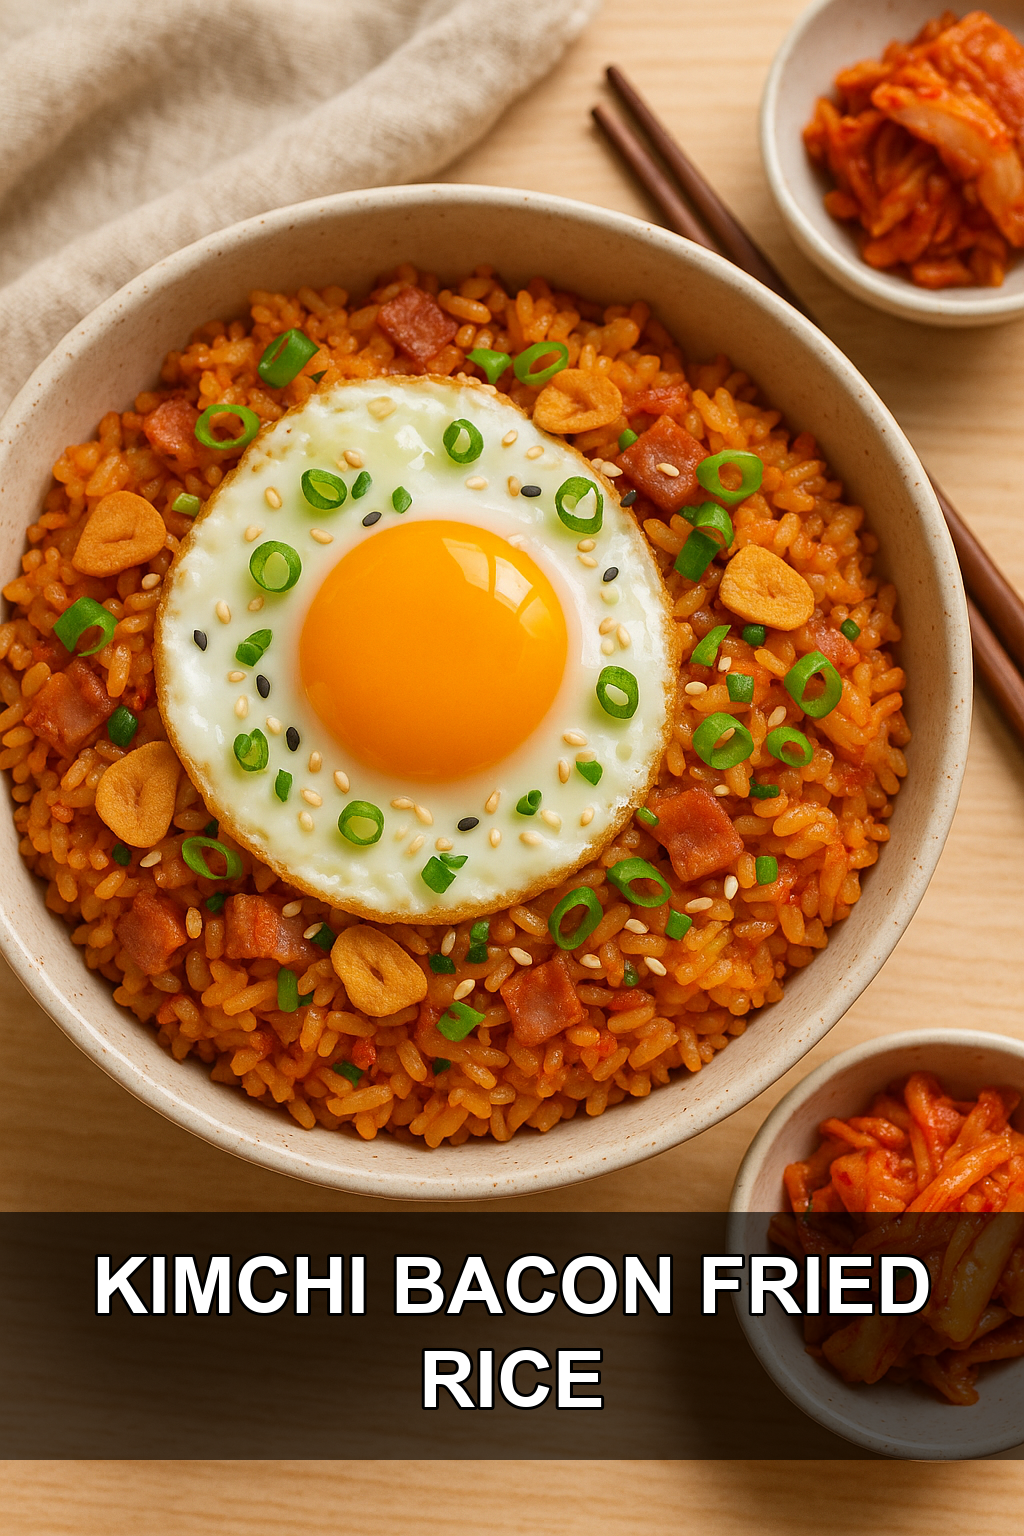
- What Is Kimchi Bacon Egg Fried Rice?
- Tips for Cooking and Prepping
- Recipe Variations and Substitutes
- Serving Suggestions
- Storing, Make-Ahead, and Freezing Tips
- FAQs
- Kimchi Bacon Egg Fried Rice with Crispy Garlic Chips Recipe
If you’ve got leftover rice and a jar of kimchi in the fridge, you’re about fifteen minutes away from one of the best meals of your week. This kimchi bacon egg fried rice is smoky, spicy, savory, and topped with the crispiest little garlic chips you’ll ever make at home.
What Is Kimchi Bacon Egg Fried Rice?
Kimchi fried rice, or kimchi bokkeumbap, is a beloved Korean comfort food built around day-old rice, fermented kimchi, and whatever protein you have on hand. The tangy, spicy kimchi caramelizes in the pan, releasing its funky, savory flavor into every grain of rice, while a fried or scrambled egg on top adds richness.
This version leans into crispy bacon for extra smokiness and depth, and finishes with homemade garlic chips fried until golden and crunchy. It’s a weeknight dinner that tastes like it took way more effort than it actually did, and it’s endlessly adaptable depending on what’s in your pantry.
Tips for Cooking and Prepping
#1: Use cold, day-old rice
Freshly cooked rice is too soft and steamy, which leads to mushy fried rice. Cold rice from the fridge has firmer, separated grains that fry up perfectly without clumping.
#2: Render the bacon fat and use it
Cook the bacon first and leave a spoonful or two of its rendered fat in the pan instead of adding fresh oil. This infuses the entire dish with smoky flavor from the very first step.
#3: Let the kimchi caramelize before adding rice
Give your kimchi a few extra minutes alone in the hot pan before tossing in the rice. This browns the edges and deepens its tang into something almost savory-sweet.
#4: Slice garlic thin and dry it well
For truly crispy garlic chips, slice the cloves paper-thin with a sharp knife or mandoline, then pat them dry so they don’t spatter or steam instead of crisping in the oil.
#5: Fry garlic low and slow, then off heat
Garlic chips go from golden to burnt in seconds. Fry them in cool oil that gradually heats up, and pull them the moment they turn light golden since they’ll keep browning as they cool.
#6: Cook eggs separately for the best texture
Scramble or fry your eggs in a separate pan rather than in the fried rice itself, so you get distinct curds or a runny yolk instead of rice-flecked scrambled bits throughout.
Recipe Variations and Substitutes
Swap the bacon for Spam, ground pork, or thinly sliced chicken thigh if you want a different protein, or leave it out entirely and add extra kimchi and mushrooms for a vegetarian version (use a vegetarian kimchi and swap the fish sauce for soy sauce or tamari). You can also stir in gochujang for extra heat, or top with sliced scallions, sesame seeds, or nori strips for more texture and flavor. Brown rice, short-grain white rice, or even cauliflower rice all work well as the base.
Serving Suggestions
Serve this fried rice hot, straight from the pan, with a fried egg on top so the yolk can run into the rice as you eat. A side of extra kimchi, a drizzle of sesame oil, and a sprinkle of toasted sesame seeds rounds it out nicely, and it pairs beautifully with a light cucumber salad or miso soup if you want to turn it into a full spread.
Storing, Make-Ahead, and Freezing Tips
Leftover fried rice keeps well in an airtight container in the fridge for up to 4 days; reheat in a hot skillet with a splash of water to loosen the grains back up. The garlic chips are best made fresh, but you can fry a big batch and store them at room temperature in an airtight container for up to a week. This dish also freezes surprisingly well for up to 2 months, just leave off the fresh egg and garlic chips until after reheating.
FAQs
Can I use freshly cooked rice instead of leftover rice?
You can, but spread it on a sheet pan and chill it in the fridge or freezer for 15-20 minutes first to dry it out. This helps prevent the mushy, clumpy texture that fresh warm rice tends to produce in fried rice.
What kind of kimchi works best for fried rice?
Well-fermented, slightly sour napa cabbage kimchi works best since its tang mellows into a deep umami flavor when cooked. Very fresh, mild kimchi won’t give you as much of that signature savory punch.
Can I make the garlic chips ahead of time?
Yes, garlic chips can be fried up to a week in advance and stored in an airtight container at room temperature. Just make sure they’re fully cooled before sealing them up so they stay crisp.
Is this dish very spicy?
It has a mild to moderate kick depending on your kimchi’s spice level, but it’s not overwhelmingly hot. Add a spoonful of gochujang or a drizzle of chili oil if you want more heat, or use a milder kimchi if you’re sensitive to spice.
Can I make this vegetarian?
Yes, simply omit the bacon and use a vegetarian-friendly kimchi (many traditional kimchis contain fish sauce or shrimp paste). Sauté some mushrooms or extra vegetables in sesame oil to replace the smoky savoriness the bacon adds.
Kimchi Bacon Egg Fried Rice with Crispy Garlic Chips Recipe
Prep time: 10 min | Cook time: 20 min | Total time: 30 min | Servings: 4
Ingredients
For the Garlic Chips
- 6 cloves garlic, sliced paper-thin
- 1/3 cup neutral oil (vegetable or avocado oil)
For the Fried Rice
- 6 slices bacon, chopped
- 1 1/2 cups kimchi, chopped, plus 2 tablespoons kimchi juice
- 1 tablespoon gochujang (optional, for extra heat)
- 4 cups cold, cooked day-old rice
- 2 tablespoons soy sauce
- 1 teaspoon sesame oil
- 3 green onions, thinly sliced, divided
- Salt, to taste
For Topping
- 4 large eggs
- 1 teaspoon toasted sesame seeds
- Extra kimchi, for serving
Instructions
- Make the garlic chips first: place the sliced garlic and oil in a small, cold saucepan or skillet. Turn the heat to medium-low and cook, stirring frequently, until the garlic turns light golden, 4-6 minutes. Immediately strain the garlic onto a paper towel-lined plate (it will continue to darken as it cools) and reserve the garlic oil for cooking.
- Heat a large skillet or wok over medium heat and cook the chopped bacon until crispy, about 6-8 minutes. Transfer the bacon to a plate, leaving about 2 tablespoons of rendered fat in the pan (add a splash of the reserved garlic oil if needed).
- Add the chopped kimchi to the same pan and cook over medium-high heat, stirring occasionally, until it starts to caramelize at the edges, about 3-4 minutes. Stir in the gochujang, if using, and the kimchi juice.
- Add the cold rice to the pan, breaking up any clumps with a spatula. Stir-fry for 4-5 minutes, pressing the rice into the pan occasionally to let it get slightly crispy in spots.
- Stir in the soy sauce, sesame oil, cooked bacon, and half of the sliced green onions. Toss everything together for another 1-2 minutes, then taste and season with salt if needed.
- While the rice finishes cooking, fry or scramble the eggs in a separate nonstick pan to your liking (a runny fried egg is classic here).
- Divide the fried rice among bowls, top each with a fried egg, and sprinkle generously with crispy garlic chips, remaining green onions, and sesame seeds. Serve immediately with extra kimchi on the side.
For extra flavor, cook the eggs in a bit of the leftover garlic oil instead of plain oil. If your kimchi is very sour, add a small pinch of sugar to balance the tang.
Leave a Reply
You must be logged in to post a comment.