
- What Are Crispy Chicken Caesar Wraps?
- Tips for Cooking and Prepping
- Recipe Variations and Substitutes
- Serving Suggestions
- Storing, Make-Ahead, and Freezing Tips
- FAQs
- Crispy Chicken Caesar Wraps with Garlic Parmesan Crisps Recipe
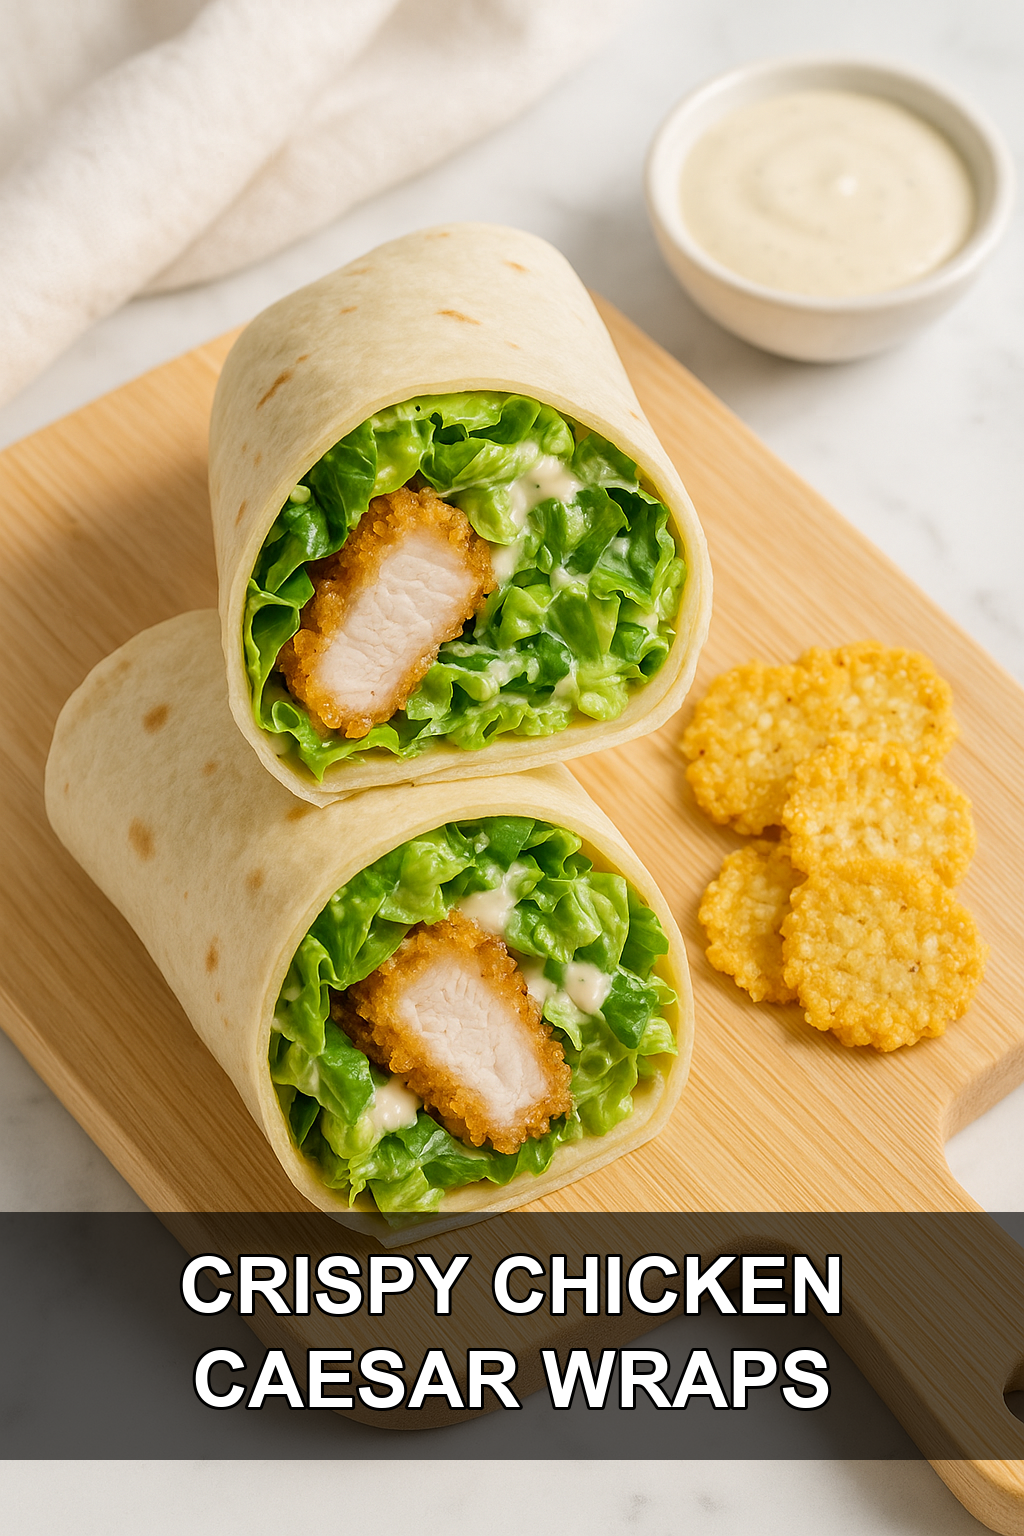
If you love a classic Caesar salad but want something a little heartier, these Crispy Chicken Caesar Wraps are about to become your new lunch obsession. Crunchy panko-crusted chicken, crisp romaine, and creamy Caesar dressing all wrapped up in a warm tortilla, plus a side of shatteringly crispy garlic Parmesan crisps for extra crunch. It’s restaurant-quality flavor you can pull together right in your own kitchen.
What Are Crispy Chicken Caesar Wraps?
Crispy Chicken Caesar Wraps take everything you love about a traditional Caesar salad — crisp romaine, shaved Parmesan, garlicky croutons, and creamy dressing — and transform it into a handheld meal. Instead of a plain grilled chicken breast, the chicken is breaded and pan-fried until golden and crunchy, adding a satisfying textural contrast to the cool, crisp lettuce and tangy dressing.
The garlic Parmesan crisps are essentially edible lace made from shredded Parmesan cheese baked until golden and crispy, similar to a cheese cracker. They stand in for traditional croutons, adding a savory, salty crunch either tucked inside the wrap or served alongside it for dipping. Together, this recipe turns a fridge-staple salad into something you’ll actually crave.
Tips for Cooking and Prepping
#1: Pound the chicken to an even thickness
Chicken breasts are often thicker on one end, which leads to uneven cooking and a soggy breading in the thin spots. Pound them to about half an inch thick so the crust turns golden and crispy all the way through.
#2: Use a wire rack when baking or resting the chicken
Placing the breaded chicken on a wire rack, whether in the oven or right after frying, keeps steam from collecting underneath so the coating stays shatteringly crisp instead of getting soggy on the bottom.
#3: Watch the Parmesan crisps closely
Parmesan goes from perfectly golden to burnt in under a minute once it starts to color, so stay near the oven during the last two minutes of baking and pull them the moment the edges turn deep gold.
#4: Dry the romaine thoroughly
Wet lettuce dilutes the Caesar dressing and makes your wrap slide apart. Spin or pat the romaine completely dry before tossing it with dressing.
#5: Warm your tortillas before wrapping
A few seconds in a dry skillet or over a gas flame makes tortillas pliable and prevents them from cracking or tearing when you roll them tightly around the filling.
#6: Dress the chicken and lettuce separately
Toss the romaine lightly in dressing on its own, and drizzle a little extra directly on the crispy chicken. This keeps the crunch intact while still making sure every bite is flavorful.
Recipe Variations and Substitutes
Swap the pan-fried chicken for grilled or air-fried chicken tenders if you want a lighter option, or use rotisserie chicken tossed in a little seasoned breadcrumb topping for a shortcut version. Kale or a romaine-spinach blend works well if you want extra greens, and you can substitute low-carb tortillas or large lettuce leaves for a lighter or gluten-free wrap. For the dressing, a store-bought Caesar dressing works in a pinch, but a quick homemade version with anchovy paste, garlic, lemon, and mayo takes the flavor up a notch.
Serving Suggestions
Slice the wraps in half on a diagonal and serve with extra garlic Parmesan crisps on the side for dipping into leftover Caesar dressing. They pair beautifully with a light tomato soup, a side of sweet potato fries, or a simple fruit salad to round out the meal. These wraps are also great cut into smaller pinwheels for parties or lunchboxes.
Storing, Make-Ahead, and Freezing Tips
Store any leftover crispy chicken and Parmesan crisps separately from the lettuce and dressing to keep everything crunchy, then assemble wraps fresh when ready to eat. The breaded chicken can be cooked ahead and refrigerated for up to 3 days, then reheated in the oven or air fryer to re-crisp. Freezing isn’t recommended once the wraps are fully assembled, but you can freeze the uncooked breaded chicken cutlets for up to 2 months and cook them straight from frozen, adding a few extra minutes to the cook time.
FAQs
Can I make these wraps ahead of time for meal prep?
Yes, but for the best texture, store the components separately and assemble the wraps just before eating. You can bread and cook the chicken up to 3 days in advance, then quickly reheat it in the oven or air fryer before wrapping.
How do I keep the garlic Parmesan crisps from sticking to the pan?
Always bake them on parchment paper or a silicone baking mat rather than directly on a greased pan, since the melted cheese can fuse to metal and tear when you try to remove it. Let them cool for a minute or two on the pan before lifting them off.
What’s the best way to reheat the crispy chicken?
Skip the microwave, which will make the coating soggy, and instead reheat the chicken in a 400°F oven or air fryer for about 8-10 minutes until it’s hot and crispy again.
Can I make this recipe healthier?
You can bake or air-fry the breaded chicken instead of pan-frying it in oil, and use a lightened-up Greek yogurt Caesar dressing to cut down on calories while still keeping plenty of flavor.
What kind of tortilla works best for Caesar wraps?
A large 10 to 12-inch flour tortilla holds up best to the crispy chicken and dressing without tearing, though a spinach or whole wheat tortilla adds nice color and flavor too.
Crispy Chicken Caesar Wraps with Garlic Parmesan Crisps Recipe
Prep time: 25 min | Cook time: 20 min | Total time: 45 min | Servings: 4
Ingredients
For the Crispy Chicken
- 2 boneless, skinless chicken breasts, halved and pounded to 1/2-inch thickness
- 1 cup all-purpose flour
- 2 large eggs
- 1 1/2 cups panko breadcrumbs
- 1/2 cup finely grated Parmesan cheese
- 1 teaspoon garlic powder
- 1 teaspoon Italian seasoning
- Salt and black pepper, to taste
- 1/4 cup olive oil, for frying
For the Garlic Parmesan Crisps
- 1 1/2 cups finely shredded Parmesan cheese
- 1/2 teaspoon garlic powder
- 1/4 teaspoon cracked black pepper
For the Caesar Wraps
- 4 large flour tortillas
- 5 cups chopped romaine lettuce, washed and dried
- 1/2 cup Caesar dressing, plus more for drizzling
- 1/3 cup shaved Parmesan cheese
- 1 clove garlic, minced (optional, for extra dressing flavor)
Instructions
- Preheat the oven to 375°F and line a baking sheet with parchment paper for the Parmesan crisps.
- For the crisps, spoon small mounds (about 2 tablespoons each) of shredded Parmesan onto the parchment, spacing them apart, and flatten slightly. Sprinkle with garlic powder and black pepper.
- Bake the crisps for 5-7 minutes, watching closely, until the edges turn golden brown. Let them cool completely on the pan until firm and crisp, then set aside.
- Set up a breading station with three shallow bowls: flour in one, beaten eggs in the second, and panko mixed with grated Parmesan, garlic powder, Italian seasoning, salt, and pepper in the third.
- Dredge each piece of chicken in flour, shaking off excess, then dip in egg, then press firmly into the panko mixture to coat both sides evenly.
- Heat olive oil in a large skillet over medium heat. Fry the chicken for 3-4 minutes per side, until deeply golden and cooked through to 165°F internally. Transfer to a wire rack to keep the crust crisp.
- Once slightly cooled, slice the chicken into strips.
- Warm the tortillas briefly in a dry skillet to make them pliable.
- In a bowl, toss the romaine with Caesar dressing until lightly coated.
- Lay each tortilla flat and layer with dressed romaine, sliced crispy chicken, shaved Parmesan, and a drizzle of extra Caesar dressing.
- Fold in the sides of the tortilla, then roll tightly from the bottom up to form a wrap.
- Slice each wrap in half on a diagonal and serve immediately with the garlic Parmesan crisps on the side.
For extra crunch, tuck a broken Parmesan crisp or two directly inside the wrap along with the lettuce. Leftover chicken and crisps store well separately in the fridge for up to 3 days.
Leave a Reply
You must be logged in to post a comment.